We have had a kitchen for the last 8 months, despite my total failure to write about it up until now.
I took a week off work once the room was all plumbed, rewired, and the new subfloor in, and spent most of that putting in the slate. Once that was done, everything was ready for the exciting bit, actually fitting the kitchen.
Jennie and had I decided on an IKEA kitchen, for several reasons, but it really boiled down to this – they had several styles that we liked, at a good price, and there was no need to haggle.
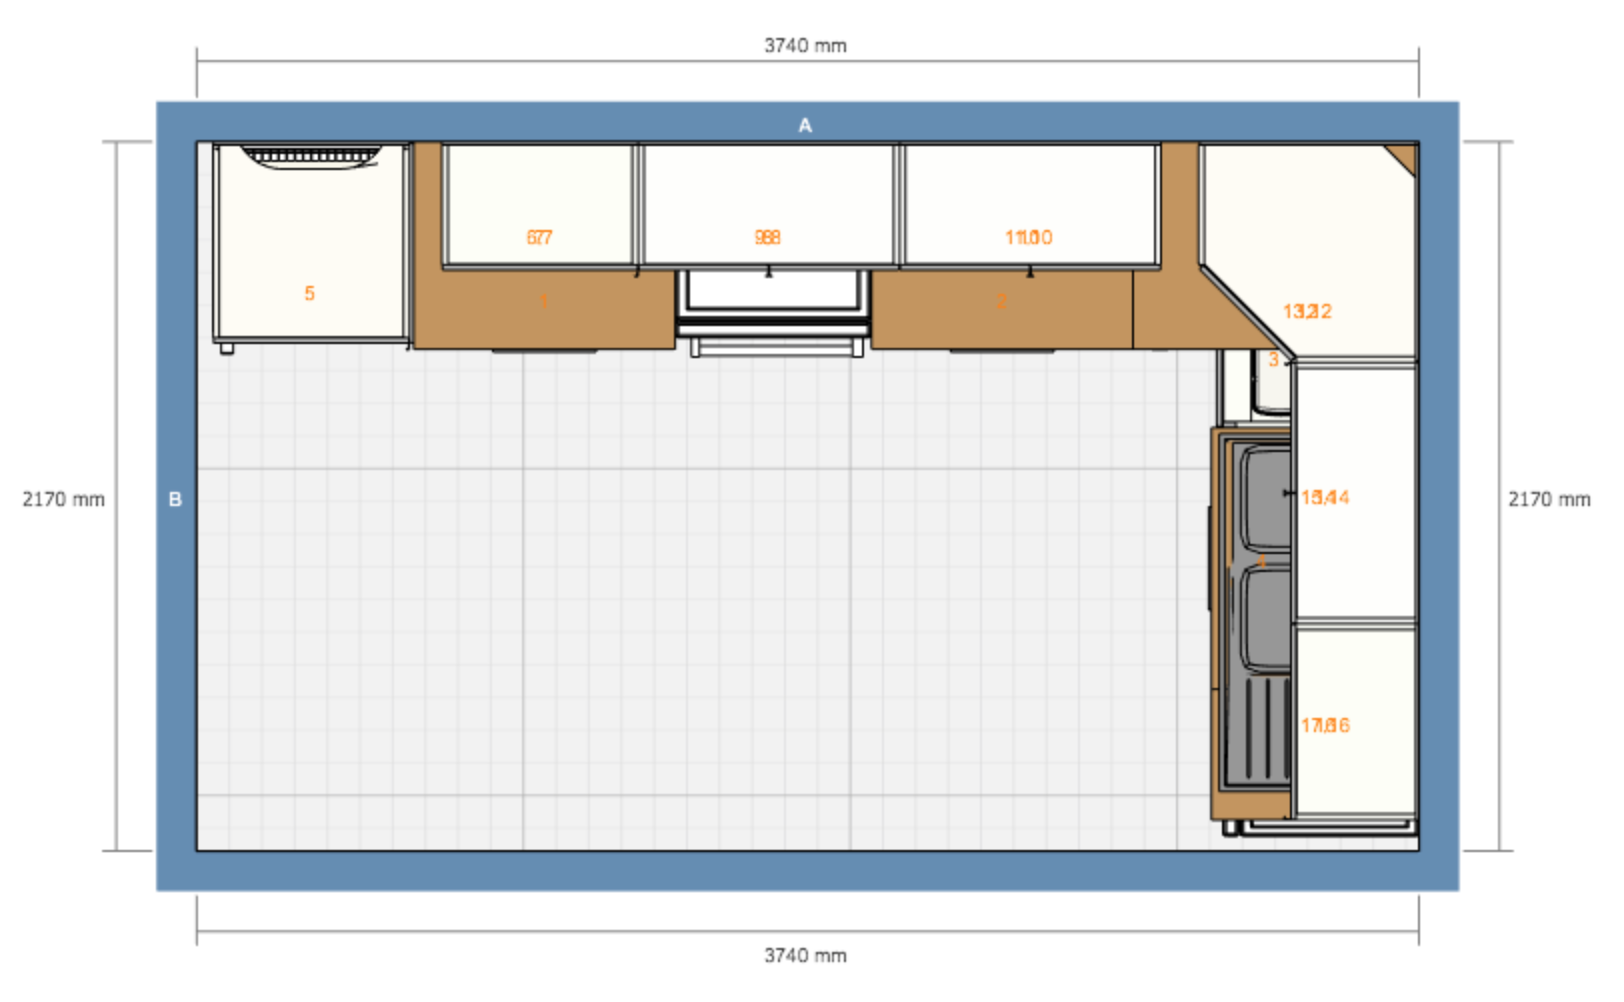
By now, we were well aquainted with IKEA’s planning tool, having tweaked and refined the design over a few months at home. We’d made a visit to IKEA to have them look over it and suggest things, then done some more tweaking at home before a final visit when we went over it all, checking every part was right and available and would fit. We picked two dates, the first three weeks ahead, for the unit bodies to arrive, and then a week later the fronts. Once everything had been carefully transferred into the ordering system, and triple checked, we went down to the tills armed with a £2400 wedge of paper for them to scan.
That price doesn’t include the worktop or appliances, and it’s a quite a long time now since we got quotes from other places, but we went through the process with some big DIY chains and kitchen companies, and the like for like quotes we got for were generally three times as much. That’s a starting point and you need to haggle, but I much prefered not having to do that.
The day came, and on that wet winter morning, two guys turned up with a van full of our cupboards; they brought everything up to our flat, and we stuck it all behind the sofa, as we checked everything off. I have now managed to forget the part number for METOD 60cm wall cabinets, but it’s taken a while.
METOD is IKEA’s system for kitchens, and I really rate it. It has some downsides, all relating to the base units, but we knew about them up front so were able to work around them. It’s designed to maximise the storage space in the units, rather than make life easy for a tradesman to install things– there’s no service void at the back, and the space underneath is limited to 8cm rather than the more usual 15cm, at least if you go for the standard worktop height of 91cm. To me, getting an extra 7cm of usable height and a similar amount of extra depth in every base unit is well worth a bit of careful planning while fitting it.

Since the kitchen had never been plumbed and wired as a kitchen before, we had a blank slate here, so we had the plumbers make sure all the pipes were within the walls, and where they couldn’t be, or where they came out, they stayed less than 8cm proud of the floor. That meant that the downsides I mentioned above were neatly worked around.
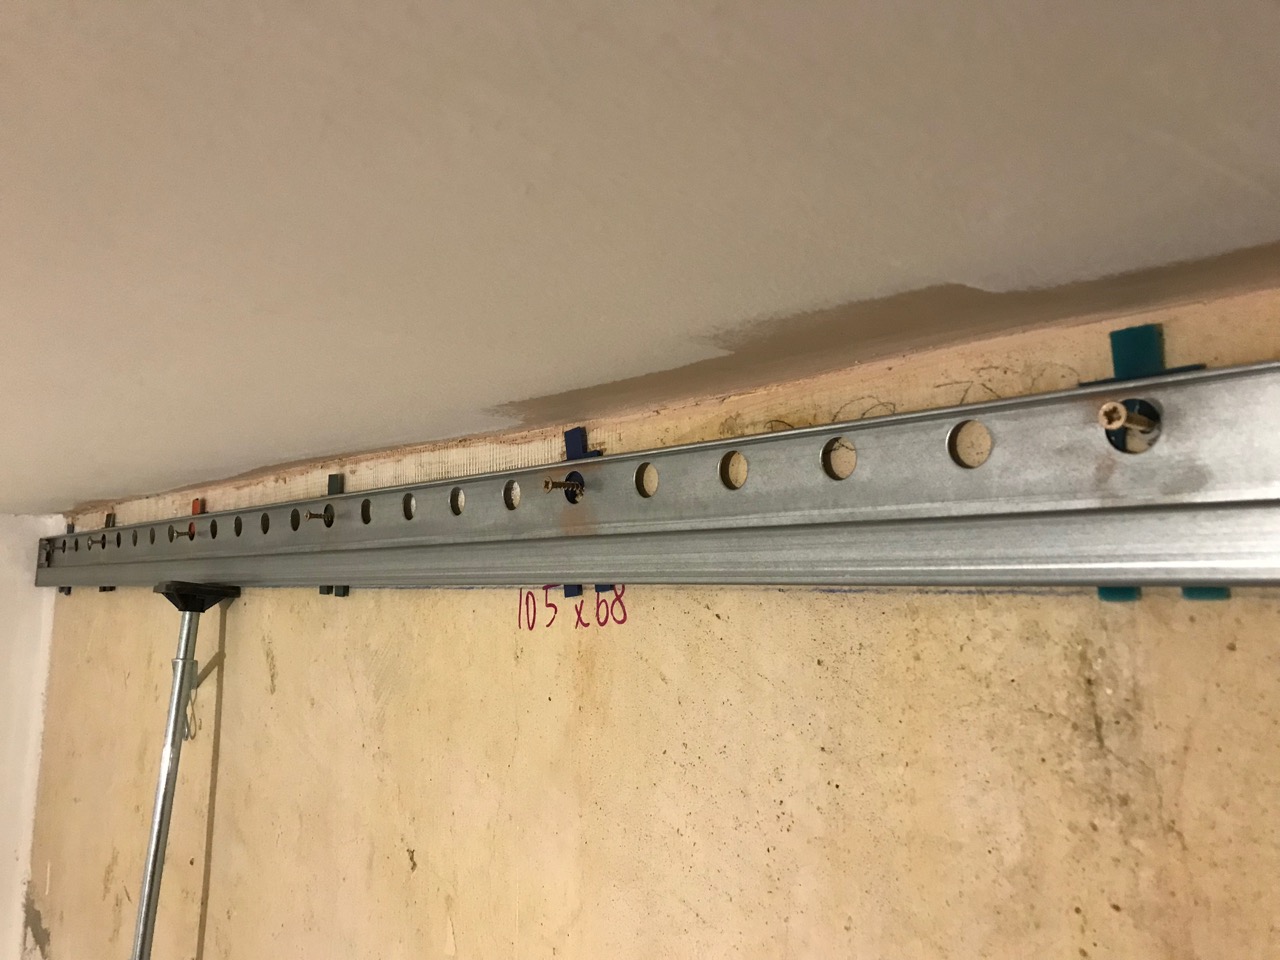
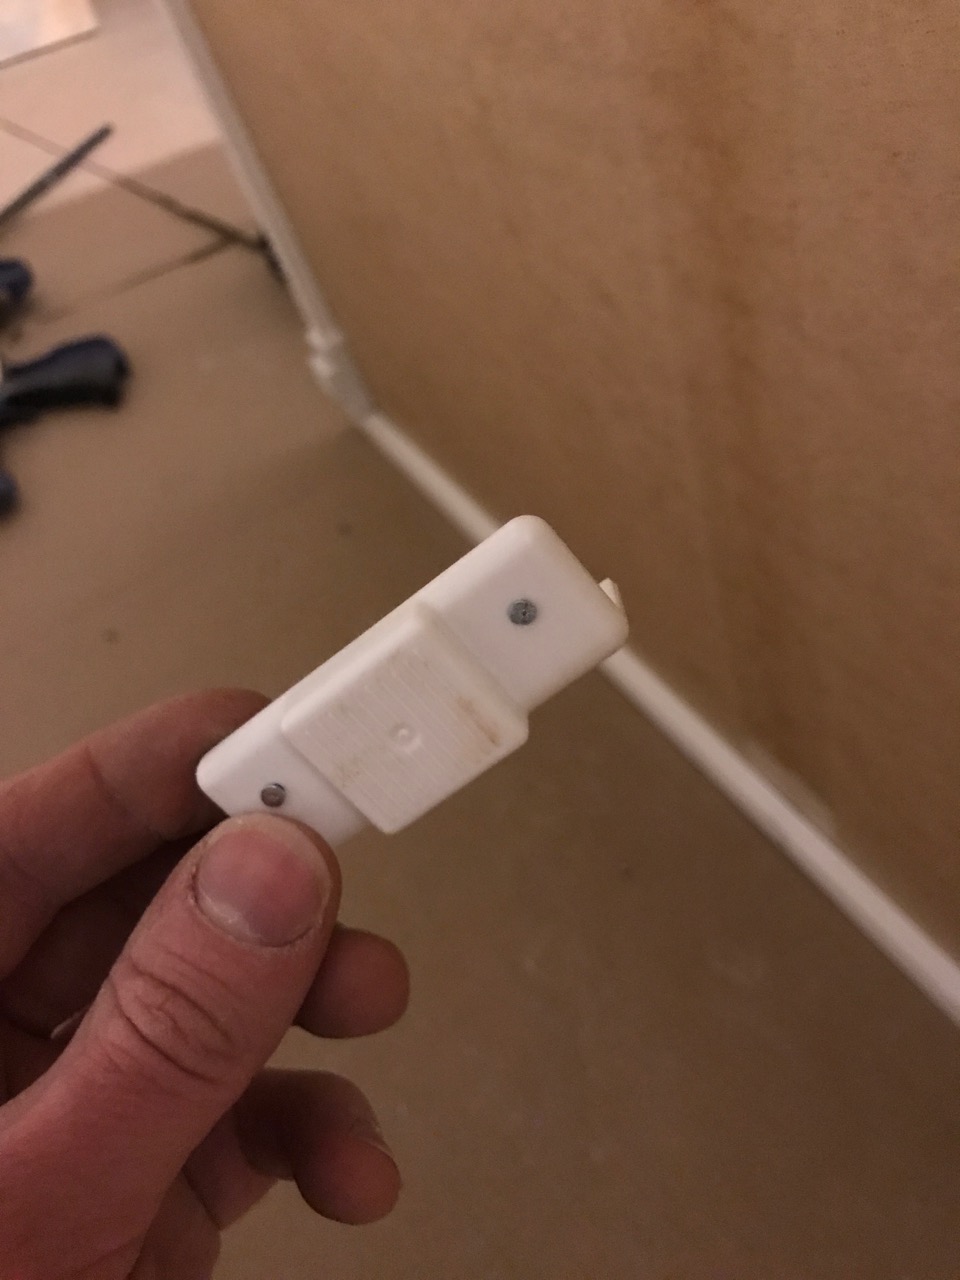
METOD cabinets can be mounted to a heavy duty steel rail which IKEA sell as part of the system. You don’t have to use this, but you should. Getting it fitted well and level does take a bit of time, depending on the wall you’re fixing it to, but it’s much easier to do that with a couple of kilogrammes of steel bar than with big, heavy bulky cabinets. Once you’re done, you can hang the units on the bar, and they’ll be levelled for you.
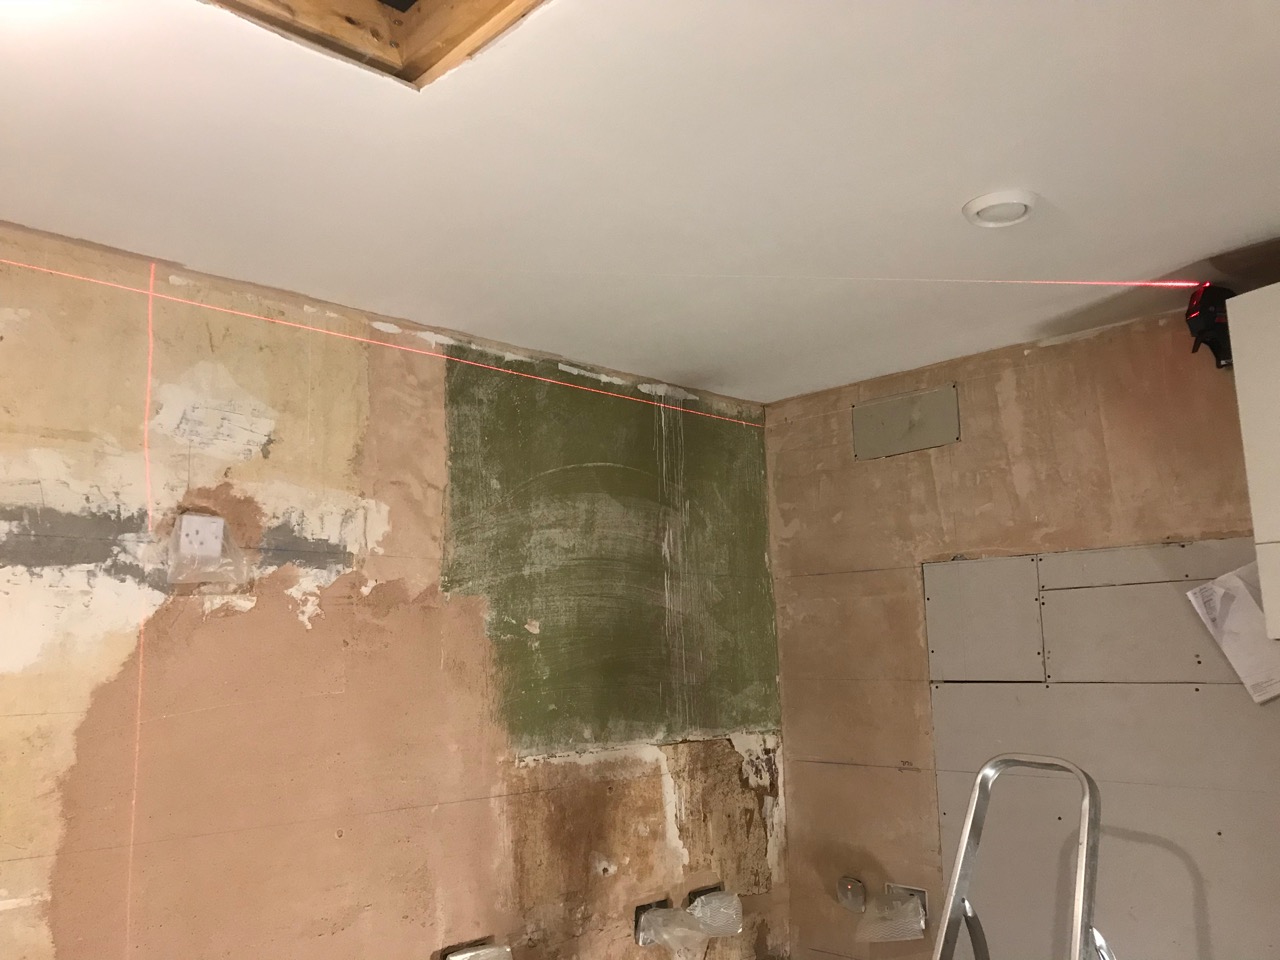
I used a laser level to get the bars fitted right, and this it was so, so useful. If you’re fitting a kitchen, it’s worth buying just for that, and then you have it for all sorts of other jobs in the future. Our kitchen’s an L-shape, and even just being able to throw a level line around that, made the job way easier than trying to use a spirit level. Combined with a good old fashioned chalk line, I was able to quickly snap the various lines I needed, working from the laser, and then check everything was right at the end again with the laser.

The thing with the rails is getting a good fixing to the wall. I found that I needed to use big Rawlok bolts to be really confident that it would hold, when I was fixing to the brick wall that most of our cabinets are on. I also needed a lot of spacers – Victorian walls are great, but they’re not flat, and the rail needs to stay straight. Fixing to the stud wall, by contrast, was a dream – just make sure you know where your studs are and hit every last one of them with a big chunky wood screw, and you can’t really go wrong.
Finally on the rails, you need to be able to check your work, so have a few wall and base cabinets built up so you can hang them as tests. I put in two rows of wall cabinets, which definitely slowed the process down as those two sets of rails had to be perfectly spaced. Everything seemed fine until I realised that all the fixings for the second row were about to go in to a line of mortar, so I had to redo the top rail which I’d just finally got well fixed.
With all that, it took me a whole day, perhaps a bit more, just to get the six rails up perfectly. It didn’t feel like good progress, just getting those few bits of steel on the wall, but the next day would.
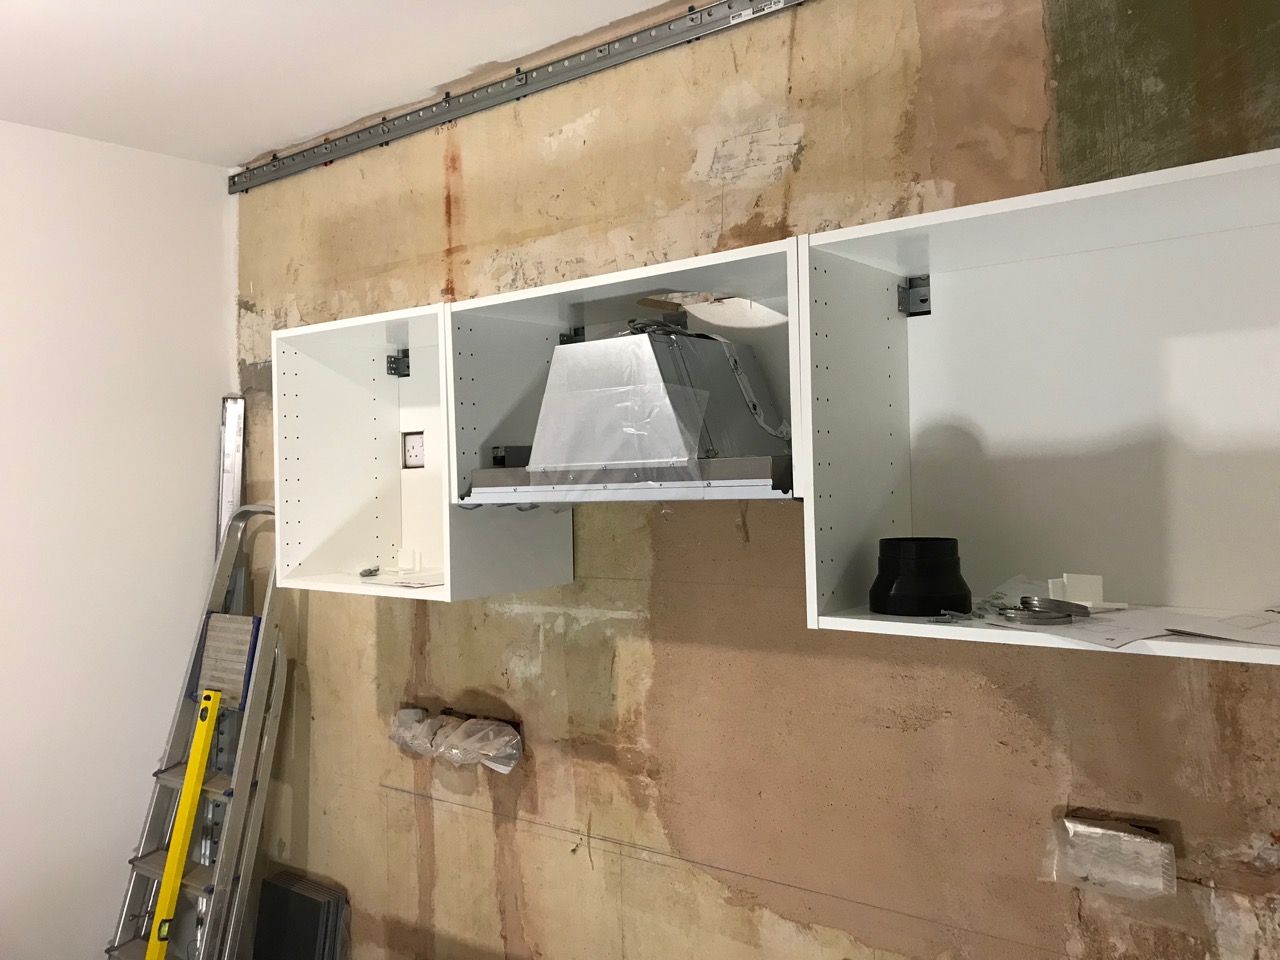
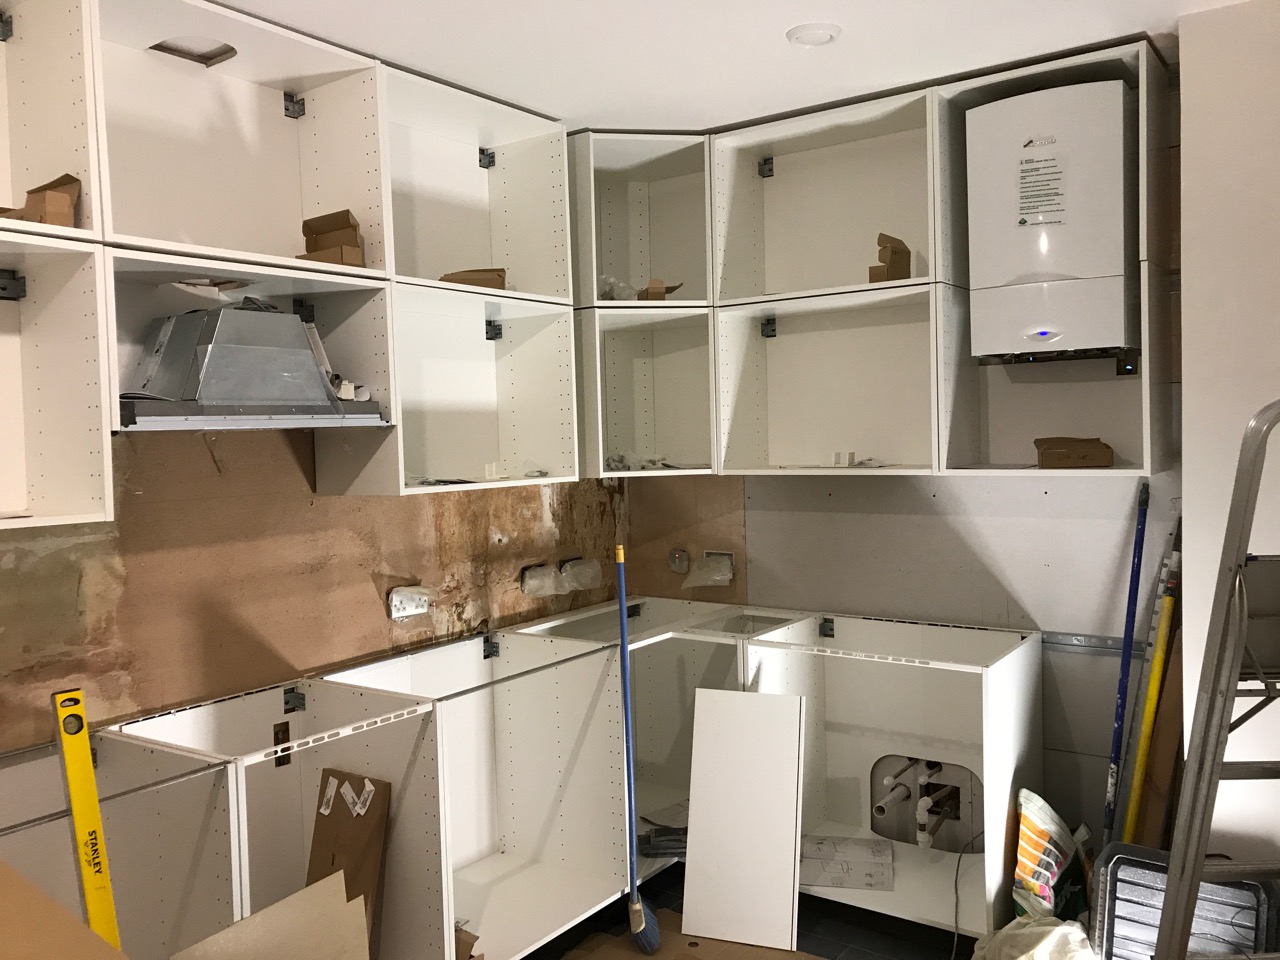
Now that we were ready to start fitting cupboards, we could start building them. This is best done with a power drill on a fast setting, at a pretty low torque limit (screws into chipboard will strip out quickly otherwise). After a careful run at the first few cabinets, we found that we could quickly put them together and get them on the wall. We built all of them, and hung them loose on the wall, before screwing anything down, just to make sure that everything was all right. I found that a few cabinets weren’t actually level, particularly on the brick wall, which I realised was because of the lumps in the wall. The cabinets have little plastic feet on the back at the bottom, which lift them off the wall by the same amount as the rail at the top. That’s great on a flat plasterboard wall, but where there’s lumps at the bottom which aren’t there at the top, it throws everything out. A bit of trial and error moving them around, and sometimes replacing them with other spacers, and everything was true again.
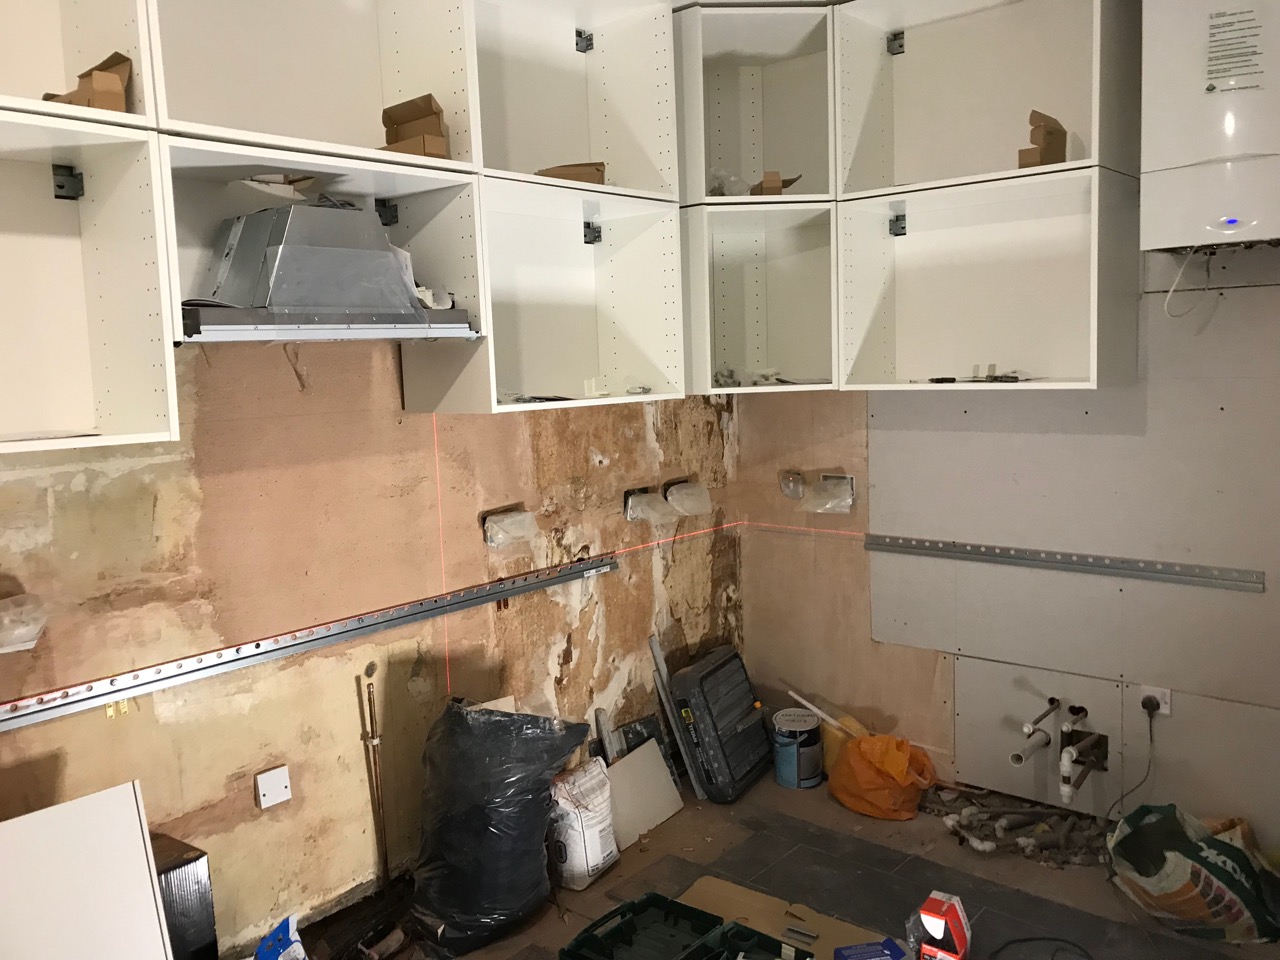
I got the wall cupboards in place quickly, followed by the base cabinets. All in all it took a day and a half to build and fit 17 units, including modifications to fit two around the boiler, and fiddling around with the extraction fan and venting.
In the following week, we had some joiners in to fit the worktop, and at the weekend, all the fronts arrived and I fit those, and the drawers.
The doors and drawers are very adjustable, but getting all of them looking good and working correctly takes quite a bit of fiddling. Fitting them took about as long as building the units in the first place. If you do what we did, and order the fronts for a later delivery than the units, put all the drawers in the second shipment too, as you can’t build the drawers without the fronts anyway.
Pictures of that next time… don’t want to give any spoilers about the worktop!
As a tenement flats renovation enthusiast myself, I always wonder why people put the wall cabinets so low.
It drives me nuts to see cabinets so low that you cannot even pour from a kettle to a thermos because there’s not enough space.
Is there any particular reason I’m missing (apart from the fear that someone won’t be able to reach stuff, which is not the case)?
Hi Coria… our wall cabinets are the lowest that Ikea’s kitchen design software recommended they should be (about 55cm, from memory.)
In our case, we went that way for two reasons: to make sure we could both reach the top shelf in the lower row of cupboards, and to maximise storage by fitting in two rows. We did consider putting them 15-20cm higher by using 40cm and 60cm cupboards, which would have been a bit nicer looking and to use the surfaces, but when we experimented we found it would have made it much harder to reach stuff on the cupboards’ upper shelves.
With the wall cupboards being shallower than the surface, we can fill our thermos and aero press fine, in the space in front of the wall cupboards… and I think even with them 15-20cm higher it’d still not be possible to do that under the wall cabinets.
The kitchen we replaced had the wall cabinets about 40cm above the surface, which was maddening because I couldn’t see much of the surface when I was standing in front of it cutting stuff.
If we had more space, I’d just go without them on one wall, next to the cooker, but that wouldn’t have left us with enough storage space really.